Zip Cord & Wiring Accessories

DIY PATIO LIGHTS

LIGHTING AS UNIQUE AS YOUR OUTDOOR SPACE

Sometimes to light your favorite outdoor gathering spot with the uniqueness your yard deserves, you need a little more control than mass market outdoor string lighting gives you. You need the power to customize -- to run lights in asymmetrical configurations or to unusual places, with no empty sockets and no spare wire hanging around. But how?

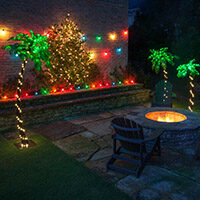
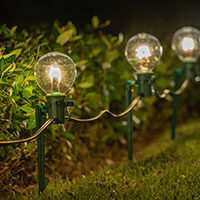
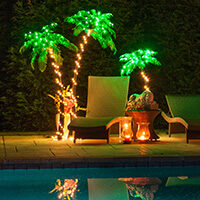
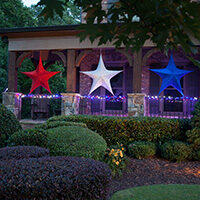
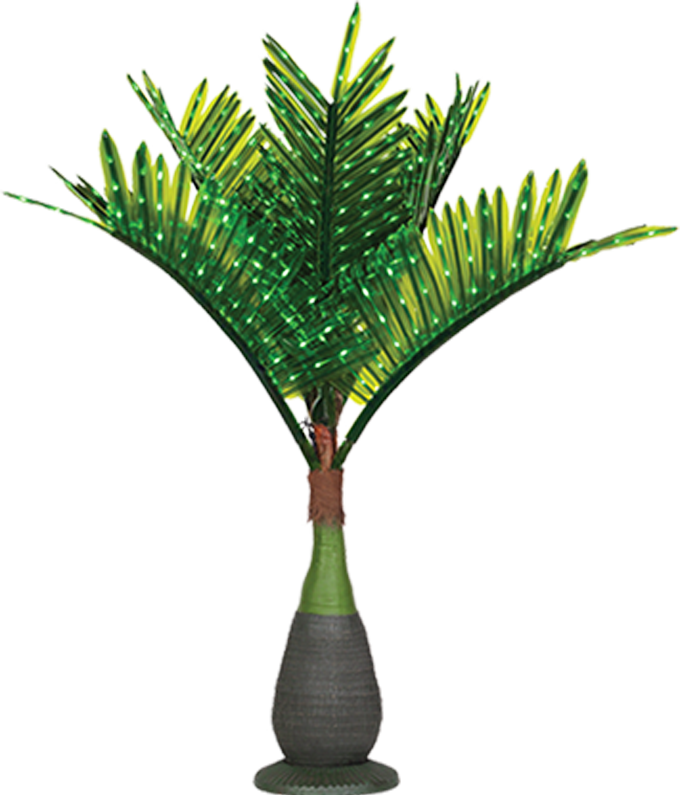
Backyards and other outdoor living spaces tend to be very unique. Nature has a way of doing that. When it comes to using outdoor string lights in these spaces, accounting for that uniqueness is equally important. Making custom extension cords or custom string lights is far easier than you may realize and the end result is beautiful outdoor lighting perfectly contoured to your setting.

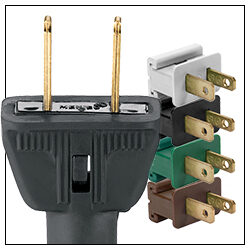
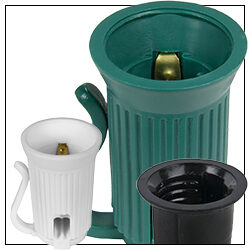
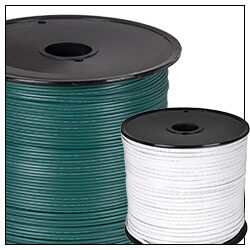
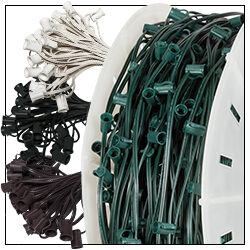
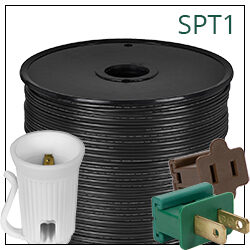
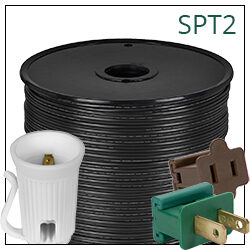
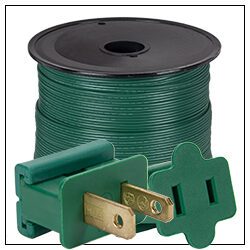
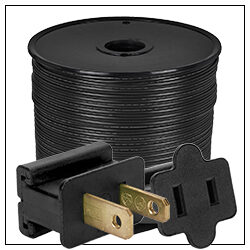
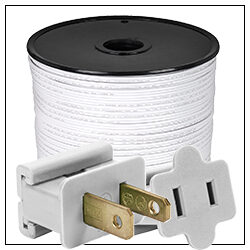
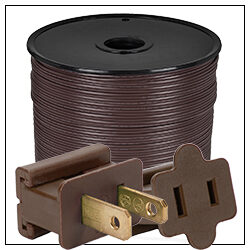
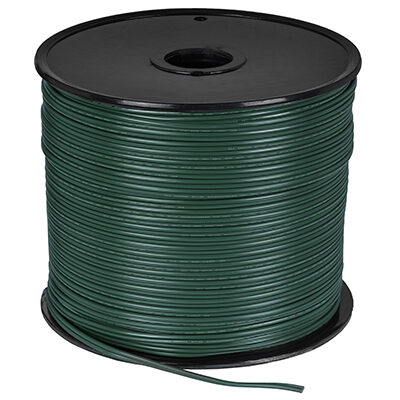
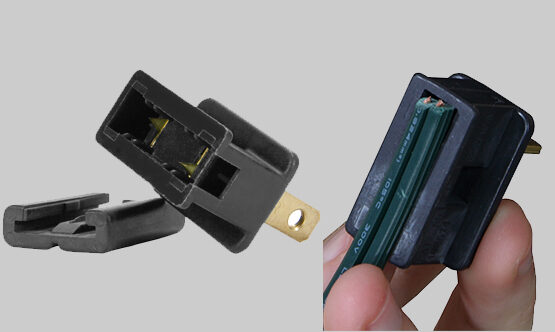
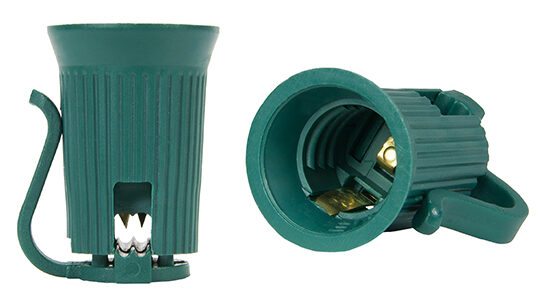
Bulk zip cord, vampire plugs and light sockets are your key to creating outdoor string lights as unique as your space. You decide how many lights you'll put up, where they'll go, which style, shape and color bulbs you'll use, and how to configure them. You'll get no wasted, leftover lights or wire -- just clean, beautiful light runs wherever you want them, and nowhere you don't.

Zip Cord Wire

Zip cord wire is about to become your new best friend because it can make custom extension cords and string lights quickly. It blends into its surroundings. It cuts to any length you need. Light sockets and vampire plugs attach to it. And of course, it connects all of your lights to that most precious commodity, the outdoor power outlet.

Zip cord, vampire plugs and sockets are designed for temporary use such as seasonal outdoor string lighting. Choosing the zip cord for your situation is simple and it boils down to three things:

  1. Choosing cord color
  2. Choosing the SPT insulation type
  3. Deciding on total length needed

Zip Cord Color

Choose a color for your zip cord that blends with your background. Green all but disappears when run along bushes or grass. Brown blends nicely with tree trunks or other wood-toned surfaces. For party canopies, white may be the perfect choice. And classic black works beautifully across open spaces against the night sky, or against many different architectural surfaces. Remember that you'll want to choose sockets and zip plugs to match the color of your wire.

SPT1 and SPT2 Zip Cord

The SPT rating of zip cord is a measure of the thickness of the wire insulation. SPT2 insulation is thicker than SPT1. Because of this, SPT2 wire is rated to carry up to 10 amps; SPT1 wire is rated to 7 amps. Choose which SPT wire you need based on how you plan to use it. For longer runs or heavy duty applications, SPT2 wire is your best choice. You never want your total power draw to exceed 80% of the amperage rating of your wire (see safety rules below). For guidance on how to calculate your power needs, use this handy guide. Then choose your wire accordingly.

Zip Cord Length

Before you start to make your own string lights, you'll want to plan your lighting configuration and measure how much zip cord you'll need. YardEnvy.com zip cord comes in 100-, 500- and 1,000-foot lengths.

Vampire Plugs

Who's afraid of a little vampire plug?

Okay, so the thought of connecting electrical plugs to wire can seem a little intimidating at times. But it doesn't need to be. The truth is, you can easily attach "vampire plugs" to zip cord wire and open up your backyard or outdoor gathering space to all the custom lighting it deserves.

What's a vampire plug? You might have heard them called zip plugs. You might have heard them called Gilbert plugs. They're all names for the same thing. But open one up and you'll see where the vampire name comes from. Inside is a pair of "vampire teeth" that bite into the wire to connect to electrical current. Vampire plugs come in three types (male, female and inline), two insulation ratings (SPT1 or SPT2) and four colors. If you're using SPT1 zip cord, use SPT1 vampire plugs (and sockets) with it. If you're using SPT2 zip cord, use SPT2 vampire plugs and sockets.

Zip Plugs

DIY: HOW TO INSTALL VAMPIRE PLUGS

Vampire plugs feature a slide-off backing that lets you lay electrical cord inside. When you slide the backing on again, this presses the cord down onto the vampire teeth, creating the connection with the electrical current. Here's how to do it.

Male vampire plugs

The first thing you'll need to do is attach a male vampire plug to one end of your zip cord.

  1. Make sure nothing you're working with is plugged in.
  2. Slide the backing off of your vampire plug. Look closely. You'll note that the backings slide off and on only one way. You may have to exert some pressure to get the backing off. Don't worry, you won't break it.
  3. Now look inside your vampire plug. You'll see two "vampire teeth" set down into the channel that runs along the length of the plug. These teeth bite into the cord when the plug is assembled to connect to electric current. Note that these teeth are not aligned. One of them is connected (through the plug) to the wide blade or receptacle; the other to the narrow. This is important.
  4. Now look closely at your zip cord. You'll note that it's actually two wires side by side. One wire has a slightly raised "rib" along one side (you may have to feel for it). This is the "neutral" wire; it connects to the wide blade or receptacle of your plug. This maintains the polarization of the electrical current -- very important.
  5. Using a knife, cutting tool or even your fingernail, gently split the end of your electrical cord to separate the two wires, pulling them apart to a length of a quarter- to a half-inch.
  6. Making sure you align the ribbed wire with the "vampire tooth" that's connected to the wide blade or receptacle of your plug, press the end of the electrical cord down into the "well" on one end of the plug. Note that the plastic divider down in the well should separate the split ends of your electrical cord.
  7. Now bend the electrical cord over and lay it into the channel that runs the length of your plug. This will lay the electrical cord across the vampire teeth (again, make sure the ribbed wire is laying on the tooth that's connected to the wide blade or receptacle). You may have to press it in a bit with your finger.
  8. Slide the backing onto the plug again. Once again some pressure may be in order; you may even need to use pliers. As you slide the backing on, it will press the electrical cord firmly onto the vampire teeth, securing the electrical connection.

For female vampire plugs, the process is identical (except you'll attach it to the other end of your electrical cord). Simply use wire cutters to cut your electrical cord the length you want, then follow the steps above to attach the female vampire plug. Use a female vampire plug also to secure the end of a run, even if you don't plug anything into it. Never leave exposed wire at the end of a run.

Inline vampire plugs

For inline vampire plugs, the process is actually a touch easier.

  1. Make sure nothing you're working with is plugged in.
  2. Slide the backing off of your inline plug.
  3. Note inside the plug the two "vampire teeth" and their orientation to the polarized receptacles of the plug. Correct polarization must be maintained with inline vampire plugs same as with male and female.
  4. Making sure you align the ribbed wire with the "vampire tooth" that's connected to the wide receptacle of the plug, lay the electrical cord into the channel in the plug.
  5. Slide the backing onto the plug again. Note how the inline plug's special design allows the electrical cord to pass through the back and come out both ends.
Light Sockets

String Light Sockets

Do-it-yourself light sockets allow you to place lights wherever you want them in your outdoor string light display, and nowhere that you don't. They come in three sizes (E12, E17 and E26), two insulation ratings (SPT1 and SPT2), and four colors.

E12 sockets are commonly used with C7 bulbs or bulbs with candelabra bases. E17 sockets are commonly used with C9 bulbs or bulbs with intermediate bases. E26 sockets are commonly used with household style bulbs that use the medium base. This flexibility both in bulb placement and bulb style is the reason string light sockets represent the pinnacle of customization in outdoor string lighting.

HOW TO INSTALL STRING LIGHT SOCKETS

The process for installing string light sockets is the same whether they're C7 or C9. They arrive in two pieces, a socket and a backing, which you connect to attach to your zip cord. Here's step-by-step how to do it.

  1. Make sure nothing you're working with is plugged in.
  2. Look at the back of your socket. You'll see two "vampire teeth" set down into the channel that runs through the back of the socket. These teeth bite into the wire when the socket is assembled to connect to electric current. Note that these teeth are not aligned. One of them is connected to a metal tab at the bottom of the socket. The other is connected (through the socket) to a metal tab on the side of the socket. This is important.
  3. Now look closely at your electrical cord. You'll note that it's actually two wires side by side. One wire has a slightly raised "rib" along one side (you may have to feel for it). This is the "neutral" wire; it connects to the vampire tooth that's connected to the metal tab on the side of your socket. This maintains the polarization of the electrical current -- very important.
  4. Lay your electrical cord into the channel on the back of the socket. This will lay the electrical cord across the vampire teeth (again, make sure the ribbed wire is laying on the tooth that's connected to the side of the socket).
  5. Set the back on the socket. Note that both the socket and the backing have a matching "hump" on one side. Align these humps to ensure you're attaching the back the right way.
  6. Press the back onto the socket. It'll take a little force to press the backing down onto the electrical cord firmly enough to press the cord onto the teeth in the socket. You may want to use pliers, or set the socket down and press the backing on with a small, hard, flat item such as a piece of wood. Apply gentle force so as not to damage the socket, and make sure the backing is seated firmly all the way around. (Don't worry. Once you've done a few of these you'll get the hang of it.)

Remember, anytime you're working with outdoor string lighting it's important to keep a few key safety tips in mind.

  1. Zip cord, vampire plugs and sockets are a great solution for custom outdoor lighting, but they are meant for temporary use only.
  2. Outdoor string lights should always be plugged into GFCI (or "ground fault") outlets as an added safety measure.
  3. Calculate your total wattage/amperage needs and then always aim to be at around 80% of the line's maximum capacity to keep it performing well. For help in calculating power needs, use this handy guide.
  4. Don't staple gun your string lights to any surface. This damages the insulation of your wiring. We have a wide variety of light clips and hangers suited to every situation. Check them out here.
  5. If you have any questions, consult a qualified electrician.